Customizing the image
Fractal types
The fractal type button icon indicates the current fractal type
(eg. ![]() for Mandelbrot Set).
When the current fractal type is a custom one,
the formula icon
for Mandelbrot Set).
When the current fractal type is a custom one,
the formula icon ![]() is displayed.
Use this button to show the list of available fractal types with the currently used one selected.
is displayed.
Use this button to show the list of available fractal types with the currently used one selected.
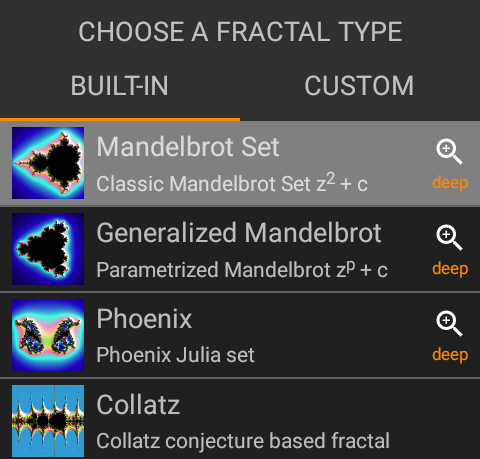
Built-in fractal types supporting the Deep zoom are labeled deep on the right.
Use tabs to switch between built-in fractal types and your custom ones. Tap a fractal type to open it with one of the following options:
| Open with default settings | Open the selected fractal using its default coordinates and style. |
| Open with current style | Open the selected fractal applying the current style (paint modes, color palettes, light, and image filter). |
| Open last visited location | Open the last visited location in the selected fractal (if available). |
After changing a fractal type the app will start rendering the image. You may adjust fractal parameters using the scrollbar.
Use the add button ![]() on the Custom tab to create
your custom fractal type.
on the Custom tab to create
your custom fractal type.
Long press a fractal type to display its context menu with the following options:
| View definition | View a definition of the built-in fractal type. |
| Edit | Edit your custom fractal type. This may affect your favorite spots using it. |
| Share | Share your custom fractal type. |
| Clone | Create a new custom fractal type by cloning the definition of the selected one. |
| Clone as advanced | Create a new Advanced definition custom fractal type by cloning the selected simple definition fractal type. |
| Delete | Delete the custom fractal type. Your favorite spots using this fractal type will be also deleted. |
Color palettes
Change a palette to use another color scheme at the same spot (not available when using a photo paint mode).
Use the palette button ![]() to show the list of available palettes with the currently used one selected.
to show the list of available palettes with the currently used one selected.
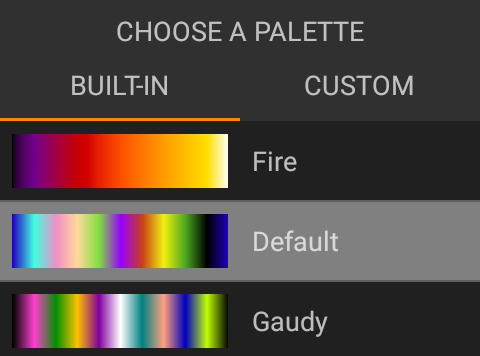
Use tabs to switch between built-in palettes and your custom ones. Tap a palette to choose it. The app will apply the selected palette without recomputing the image (unless you use the Supersampling).
Use the add button ![]() on the Custom tab to create your
custom palette.
on the Custom tab to create your
custom palette.
Long press a palette to display its context menu with the following options:
| Edit | Edit your custom palette. This may affect your favorite spots using it. |
| Share | Share your custom palette. |
| Clone | Create a new custom palette by cloning the definition of the selected one. |
| Delete | Delete the custom palette. Your favorite spots using this palette will be changed to use a default one. |
In the Advanced mode, the palette button is not visible.
Use the magic wand button ![]() instead to enter
the Advanced image control screen.
instead to enter
the Advanced image control screen.
Paint modes
Change a paint mode to reveal new patterns at the same spot. You can learn more about paint modes in the Coloring techniques section. You may find useful reading the Orbit trap subsection which explains how to use the common parameters of orbit trap based paint modes.
Use the brush button ![]() to show the list of available paint modes with the currently used one selected.
to show the list of available paint modes with the currently used one selected.
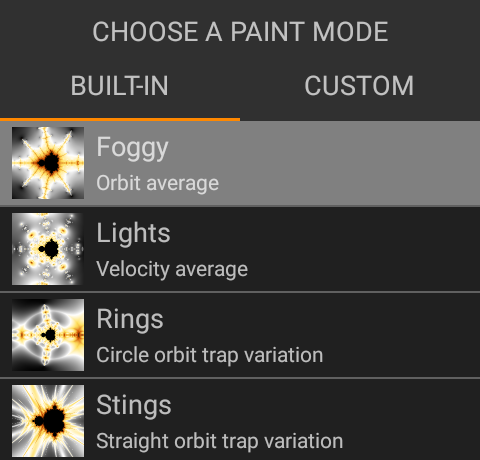
Use tabs to switch between built-in paint modes and your custom ones. Tap a paint mode to choose it. The app will restart rendering the image.
You may adjust paint mode parameters using the scrollbar.
Use the add button ![]() on the Custom tab to create your
custom paint mode.
on the Custom tab to create your
custom paint mode.
Long press a paint mode to display its context menu with the following options:
| View definition | View a definition of the built-in paint mode (not available for the special photo paint modes). |
| Edit | Edit your custom paint mode. This may affect your favorite spots using it. |
| Share | Share your custom paint mode. |
| Clone | Create a new custom paint mode by cloning the definition of the selected one (not available for the special photo paint modes). |
| Clone as advanced | Create a new Advanced definition custom paint mode by cloning the selected simple definition paint mode. |
| Delete | Delete the custom paint mode. Your favorite spots using this paint mode will be changed to use a default one. |
| Create thumbnail | Create a thumbnail for your custom paint mode based on the current image (which must use this paint mode). You may later change the thumbnail by using this option again. |
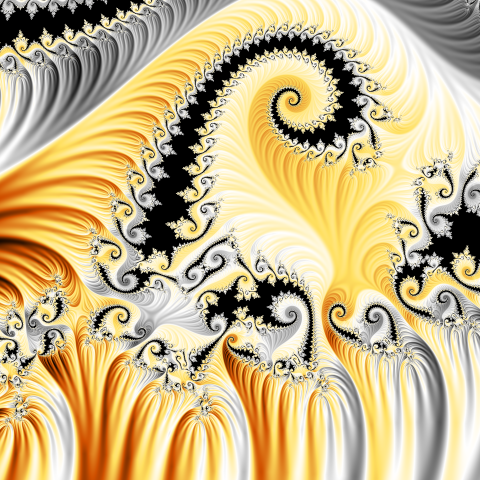
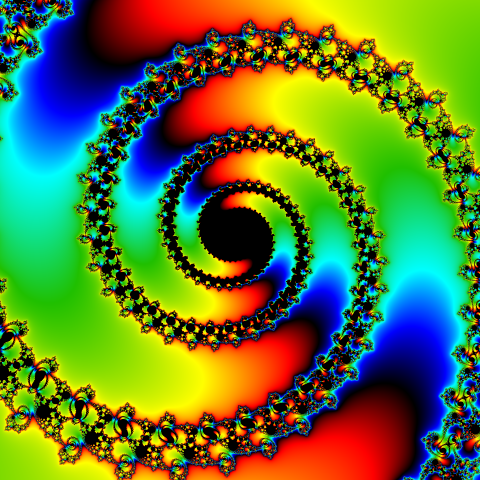
An example result of applying Stripes paint mode to a Phoenix fractal zoom.
In the Advanced mode, the brush button is not visible.
Use the magic wand button ![]() instead to enter
the Advanced image control screen.
instead to enter
the Advanced image control screen.
Using photos
To use photos, first select one of the special photo paint modes (with the names starting with Photo). Depeding on the current location, you may need to adjust paint mode parameters (such as Size or Radius), to make photos clearly visible.
The resulting image may contain photos that are distorted in various ways, depending on the current location.
NOTE: when using Photo paint, the background color is controlled by paint mode parameters: Background hue, Background saturation, and Background brightness. Color palettes cannot be selected.
You can learn more about how this works in the Photo coloring section.
Use the photo button ![]() to show the list of available photos with the currently used one selected.
to show the list of available photos with the currently used one selected.

Use tabs to switch between built-in photos and your custom ones. Tap a photo to choose it. The app will start rendering the image.
Use the add button ![]() on the Custom tab to add your
custom photo (available only in the Premium mode).
on the Custom tab to add your
custom photo (available only in the Premium mode).
Long press a custom photo to display its context menu with the following options:
| Rename | Rename the custom photo. |
| Delete | Delete the custom photo. Your favorite spots using this photo will be changed to use a default one. |
In the Advanced mode, the photo button is not visible.
Use the magic wand button ![]() instead to enter
the Advanced image control screen.
instead to enter
the Advanced image control screen.
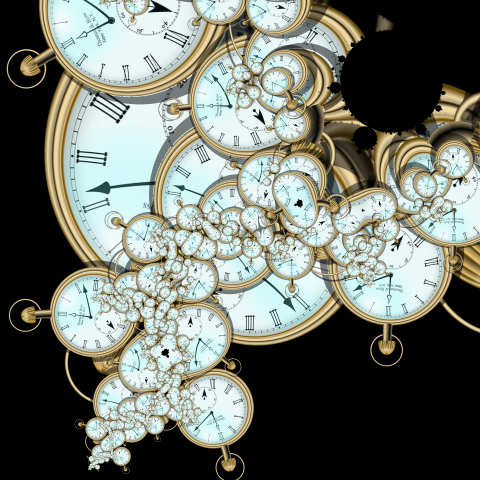
An example result of applying the Photo pearls paint mode to a Mandelbrot set zoom.
Light
Give your fractal image a glassy 3D look by applying light.
Use the scrollbar menu button ![]() and open the Light section (marked with
and open the Light section (marked with ![]() )
to select from the available options described in the Light parameters section.
The app will apply the selected light options without recomputing the image (unless you use the Supersampling).
)
to select from the available options described in the Light parameters section.
The app will apply the selected light options without recomputing the image (unless you use the Supersampling).
The app renders light using the Blinn–Phong reflection model.
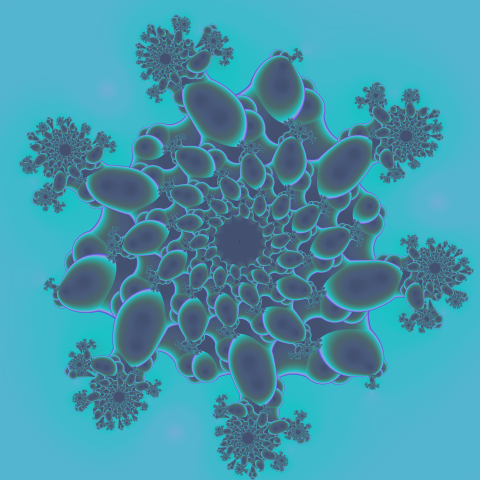
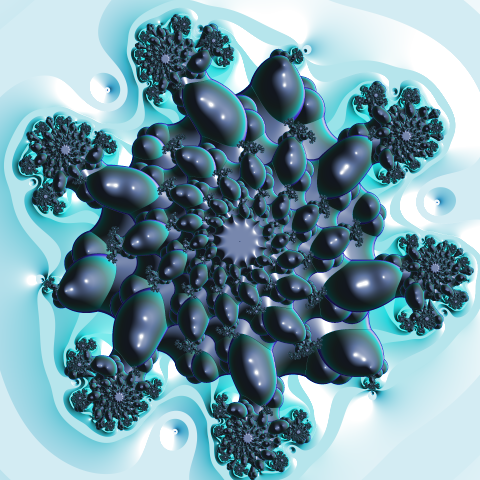
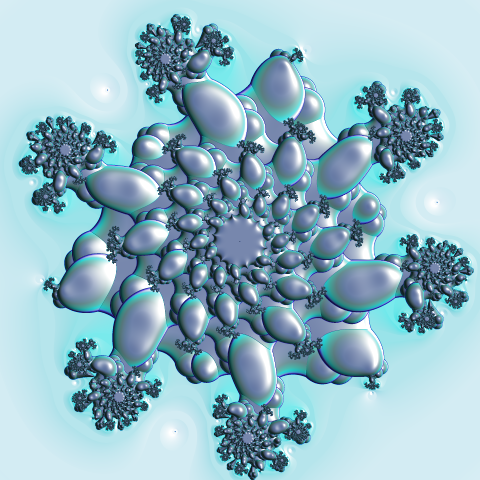
An example result of applying light to a Cuttlefish fractal zoom.
Image filters
Give a final touch to your fractal image by applying an image filter.
Use the image filter button ![]() to show the list of available image filters with the currently used one selected.
to show the list of available image filters with the currently used one selected.
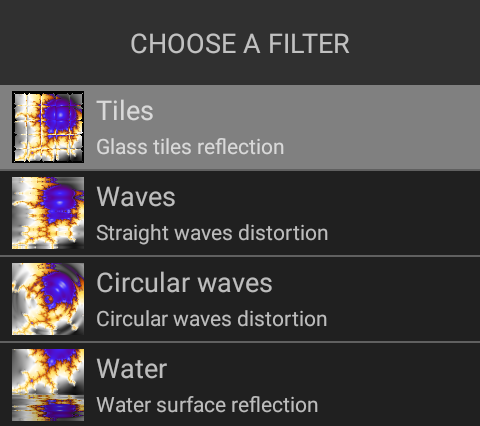
Tap a filter to choose it. The app will apply the selected filter without recomputing the image.
You may adjust image filter parameters using the scrollbar.
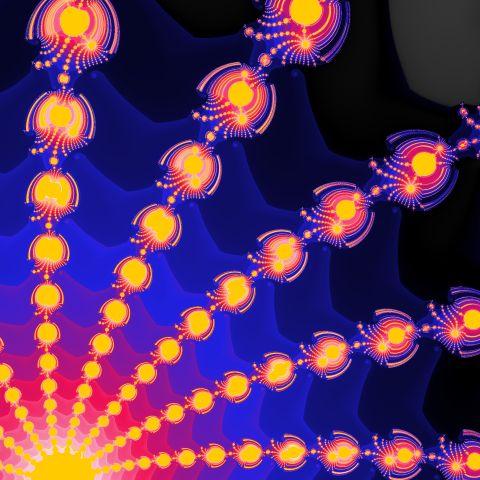
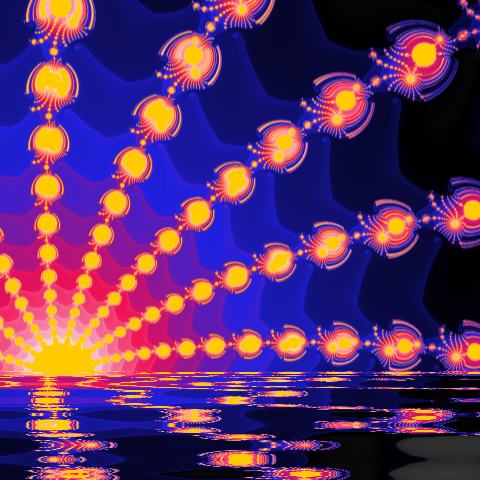
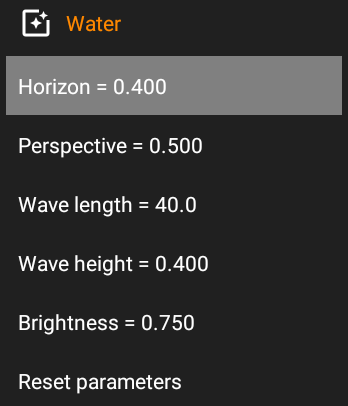
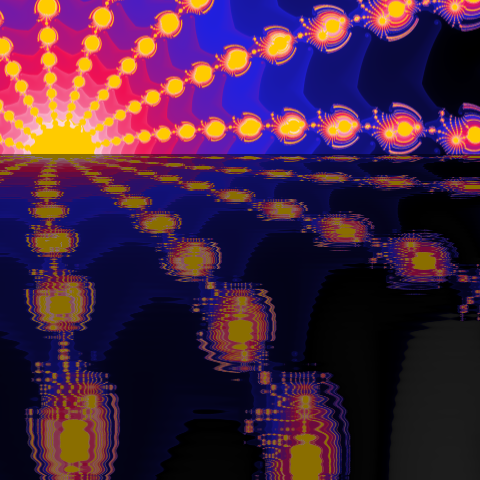
An example result of applying the Water image filter to a Simonbrot fractal zoom.
In the Advanced mode, the image filter button is not visible.
Use the magic wand button ![]() instead to enter
the Advanced image control screen.
instead to enter
the Advanced image control screen.
Using the scrollbar
Use the scrollbar to interactively change the image parameters.
When no parameters are available the scrollbar is hidden and you can see only its menu button
![]() .
.
You may customize the scrollbar's orientation using the Settings / Appearance / Scrollbar orientation option.
The name and value of the currently active parameter are displayed in the scrollbar. You may change the value by dragging the scrollbar thumb, tapping the scrollbar, tapping or long-pressing scrollbar arrow buttons.
You may also long-press the thumb to show a popup dialog allowing you to input the desired value using the keyboard. Long press the scrollbar menu item to input a parameter value without switching to this parameter.
The image is adjusted on the fly. Palette length/offset and filter parameters changes are applied without recomputing the whole image. In the other cases the app restarts image rendering and image quality may be reduced until you stop changing the parameter value. When using the Supersampling, the image rendering restarts after any change except changing image filter options.
In the Advanced mode, the thumb displays an icon showing whether the current parameter
concerns a fractal interior
![]() ,
or exterior
,
or exterior ![]() .
.
Tap the scrollbar menu button ![]() to show a menu containing
available parameters with their values and additional options for customizing the image.
to show a menu containing
available parameters with their values and additional options for customizing the image.
You may also show the menu by swiping from the side of the screen. You can hide the menu button and use only swiping to show the menu (Settings / Appearance / Hide scrollbar menu button option.)
The currently active parameter is highlighted. The menu content depends on the selected fractal type, paint mode, light mode, and image filter.
The scrollbar menu is organized in the collapsible sections. Tap the section heading (orange caption) to expand the section. You may keep all the sections always expanded using the Settings / Appearance / Scrollbar menu sections always expanded option.
The menu sections are described in the following tutorial sections.
Fractal parameters
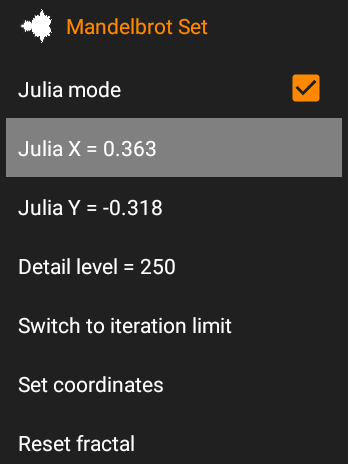
An example fractal parameters section of the scrollbar menu.
The section header displays the current fractal type name and its icon. The section contains the following items:
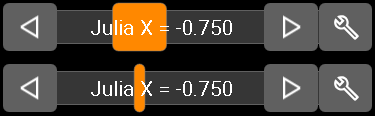
| Julia mode | Use this checkbox to turn Julia mode on and off (available only in the Advanced mode). |
| Julia X | Julia mode X parameter (visible only in Julia mode). |
| Julia Y | Julia mode Y parameter (visible only in Julia mode). |
| Fractal parameters | A menu item for each fractal type parameter (visible only if the current fractal type has any parameters). After you change the value of the parameter (including Julia X and Julia Y) at zoom 10 or higher, the app automatically sets the default coordinates and zoom to display the entire picture of the changed fractal. You may turn this off using the Settings / Behavior / Reset coordinates on parameter change setting. |
| Iteration limit | Use this parameter to control the Iteration limit (available only in the Advanced mode). |
| Detail level | An alternative way to control the iteration limit in the Advanced mode. Only one of these two items (Iteration limit, Detail level) is visible at a time. |
| Switch to iteration limit | Switch from controlling the detail level to controlling the iteration limit (visible only in the Advanced mode when the Detail level control is active). |
| Switch to detail level | Switch from controlling the iteration limit to controlling the detail level (visible only in the Advanced mode when the Iteration limit control is active). |
| Set coordinates | Show a pop-up dialog for changing coordinates and zoom factor. WARNING: in the Deep zoom, this feature may be not quite useful due to possible loss of coordinates precision. |
| Reset fractal | Set the default location for the current fractal type. This includes setting the default coordinates and zoom factor, default Julia mode, default paint modes (Default exterior and Solid interior for most fractal types), default palettes, default light, no image filter. |
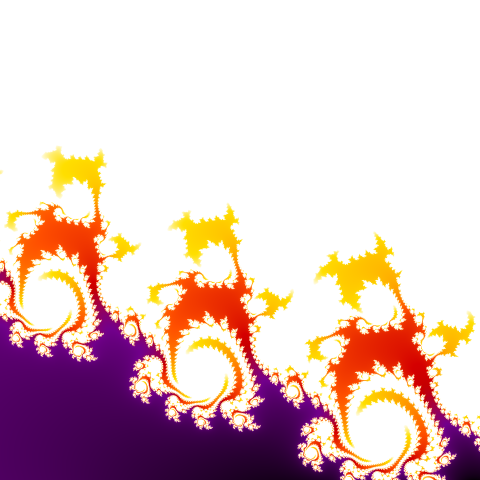
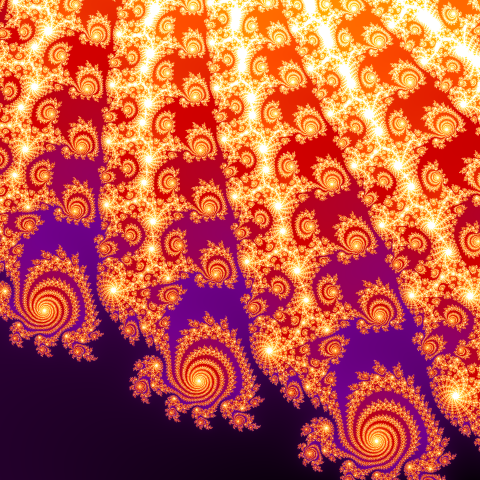
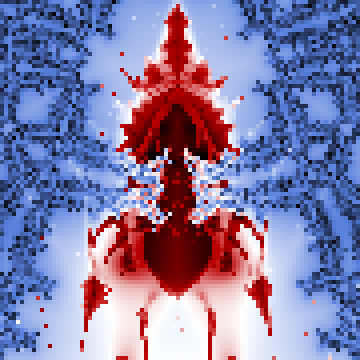
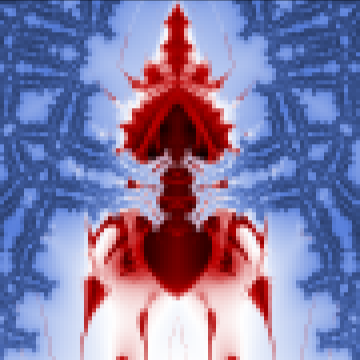
An example result of changing the iteration limit at the built-in Winnie-the-Pooh location.
Paint parameters

An example paint parameters section of the scrollbar menu (in the Simple mode).
In the Advanced mode, there can be two separate paint mode menu sections.
Teh first is for the fractal interior paint, and the second for the fractal exterior paint.
They are marked by icons:
![]() for the interior, and
for the interior, and
![]() for the exterior.
When the same paint settings are applied to the entire image, there is only one section indicated
by
for the exterior.
When the same paint settings are applied to the entire image, there is only one section indicated
by ![]() .
.
The section header displays the current paint mode name. The section contains the following items:
| Paint mode parameters | A menu item for each paint mode parameter (visible only if the current paint mode has any parameters). |
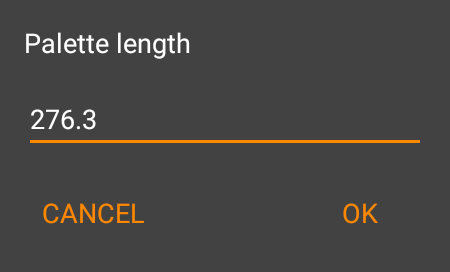
| Palette length | Use this parameter to change the length of the color cycle within the range of [1e-28, 1e+28]. For this parameter, the scrollbar uses a logarithmic scale and only part of the range is visible at once (3 orders of magnitude, e.g. [0.1, 100]). After moving the scrollbar's thumb near the end of the scrollbar and releasing it, the visible range is automatically adjusted to allow further change. This parameter is not visible when Auto adjust is turned on, and when using a photo paint mode. |
| Palette offset | Use this parameter to shift the color cycle without changing its length. This parameter is not visible when Auto adjust is turned on, and when using a photo paint mode. |
| Auto adjust | Use this checkbox to turn automatic palette length adjusting on and off.
When it is turned on, the app automatically sets the palette length and offset
to cover most of the image with one palette cycle, starting from the beginning of the palette. The exceptions are Default and Classic paint modes for which the adjusted palette cycle always spans from the lowest visible iteration count value to the iteration limit. This option is not available when using a photo paint mode. |
| Adjust now | Use this option to let the app to adjust the palette length and offset for the current image.
This option is not available when Auto adjust is turned on. By default, this action is also performed by the app when you change the paint mode, but you can turn it off using the Settings / Behavior Palette adjusting option. This option is not available when using a photo paint mode. |
| Reset parameters | Restore the default values of the current paint mode parameters. |
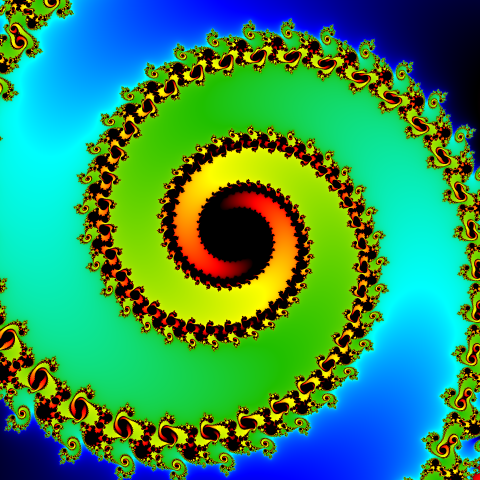
An example result of changing the palette length.
Light parameters

An example light parameters section of the scrollbar menu.
The section header displays the current light mode. The section contains the following items:
| Light off | Turn off the light. |
| Light 1 | Use the paint value as the surface elevation for the light.
The explanation of what the paint value is can be found in the Coloring techniques section. In case of photo paint modes, the elevation is the distance from the photo center (the highest at the center). |
| Light 2 | Use the iteration count value as the surface elevation for the light. |
| Light 3 | Use the color brightness as the surface elevation for the light. |
| Light direction | The light direction angle from 0 (from the image top), through 90 (from the right), 180 (from the bottom), 270 (from the left), to 360 (from the top again). |
| Light angle | The light incidence angle from 0 (horizontal), to 90 (vertical). |
| Light intensity | The light intensity value. |
| Surface depth | The surface elevation scale from 0 (completely flat), through 1 (default), to 10 (the most convex). |
| Detail scale | The parameter allowing to reduce the surface convexity depending on the iteration count. The default value of 0 means no reduction. Using this parameter may help to avoid noticeable darker colors where the smallest details are (especially when using the supersampling). In those areas the surface is the most convex, because the same changes in elevation occur at shorter distances. |
| Ambient light | The strength of the scattered light affecting the brightness of the image regardless of the convexity. |
| Reflection intensity | The parameter controlling the intensity of the light reflections, which make the image looking glassy. |
| Shininess | The parameter controlling the size of the light reflections. The higher the value, the smaller the reflections. |
| Reset parameters | Restore the default values of the light parameters. |
An example result of changing the Surface depth parameter value.
Image filter parameters
An example image filter parameters section of the scrollbar menu.
The filter parameters section is visible only if the current image filter has any parameters. The section header displays the current filter name. The section is visible only if the current filter has any parameters.
| Filter parameters | A menu item for each image filter parameter. |
| Reset parameters | Restore the default values of the current filter parameters. |
An example result of changing image filter parameters.
Scrollbar fine-tuning
You can get very precise control over the parameter value by moving your finger away from the scrollbar as you drag the scrollbar's thumb. The farther you move your finger, the more precise the control is, and the narrower the thumb is displayed.
The scrollbar in the normal mode (on the top) and the fine-tuning mode (on the bottom).
Touch the scrollbar's thumb and quickly move your finger away from the scrollbar to continue fine-tuning. The app will not change the parameter value during that quick move.
Smart scrollbar switching
After some user actions, the application switches automatically the active parameter to the one that can be most useful in a particular situation. This includes:
- After changing a fractal type, the app switches to the first fractal parameter (if the selected fractal type has any parameters).
- After changing a paint mode, the app switches to the first paint mode parameter (if the selected paint mode has any parameters). When there are no parameters and Auto adjust is off, the app switches to the palette length or to the palette offset (for the built-in Solid paint mode).
- After turning on the light or changing the light mode, the app switches to the light direction parameter.
- After applying an image filter, the app switches to the first image filter parameter (if the selected image filter has any parameters).
- After turning off Auto adjust, the app switches to the palette length or to the palette offset (for the built-in Solid paint mode).
- After switching between the Detail level control and the Iteration limit control, the app switches to the Detail level or Iteration limit, respectively.
- After entering Julia mode, the app switches to Julia X parameter.
- After resetting parameters (for a paint mode, light or image filter), the app switches to the first parameter.
- After resetting a fractal, the app switches to the first fractal's parameter.
You can turn this off using the Settings / Behavior Smart scrollbar switching option.
Randomizer
Use the Randomizer button ![]() to randomly change the image.
to randomly change the image.
NOTE: as is usually the case with random action, most the results are unlikely to be particularly pretty, but some may be really surprising.
Long press the button to enter the Randomizer setup menu where you can set the following options:
| Keep current location | Keep the current fractal type, fractal parameters, coordinates, and zoom. | |
| Randomize coordinates | Keep the current fractal type and parameters, including Julia mode and Julia coordinates. Randomly choose coordinates, zoom, and rotation angle. Use this option to randomly explore the selected fractal. | |
| Randomize location | Randomly choose a fractal type, coordinates, zoom, and rotation angle. Default fractal parameters values will be used. This can lead you to a place you may never have visited before. | |
| Pick out location | Randomly choose a location from the built-in examples and your favorites. | |
| Apply current style | Apply the current paint mode, palette, light, and image filter to the resulting location.
This can be overwritten by selecting "Randomize palette", "Randomize paint mode", "Randomize light", and "Randomize image filter" options.
You can uncheck this option only when the "Pick out location" option is selected. |
|
| Randomize palette/photo | Randomly choose a color palette as well as the palette length and offset values. When using a photo paint mode, randomly choose a photo. | |
| Randomize paint mode | Randomly choose a paint mode as well as the palette length and offset values. | |
| Randomize light | Randomly choose the light mode and light parameters values. | |
| Randomize image filter | Randomly choose an image filter. | |
| Apply to exterior | Apply randomized palette / photo / paint mode to the fractal exterior. The "Apply to" options are available in the Advanced mode when the "Randomize palette/photo" or "Randomize paint mode" option is selected. |
|
| Apply to interior | Apply randomized palette / photo / paint mode to the fractal interior. | |
| Apply to both independently |
Apply randomized palette / photo / paint mode independently to the fractal exterior and interior. | |
| Apply to both the same settings |
Apply the same paint settings to the entire image. | |
| Use custom content | Also choose from your custom locations, fractal types, paint modes, palettes, and photos. |
Tap OK or tap outside the popup to save your changes and hide the menu.
Image size
Use ![]() Image size option from the action menu
to show the menu displaying the available options with the currently used highlighted, and the resulting image size in pixels.
Image size option from the action menu
to show the menu displaying the available options with the currently used highlighted, and the resulting image size in pixels.
Choose the image size using the Resolution options.
Select the Custom option and tap the image size item (where ![]() icon will appear)
to enter your custom image width and height.
icon will appear)
to enter your custom image width and height.
The resolution may be limited by the screen resolution of your device. Use the High Resolution Rendering option to create images with higher resolution.
When the Fit screen option is selected, use the Quality options to select the image quality (100% means full screen resolution).
Use the Aspect ratio options (not Available for the Fit screen and Custom resolution options) to select the image format. (A) means the standard A series paper format.
Tap OK or tap outside the popup to save your changes and hide the menu.
The current image size in pixels is displayed in the status bar.
NOTE: using lower resolution may save the battery power and increase responsiveness.
Supersampling
Use ![]() Supersampling option from the action menu
to show the menu displaying the available options with the currently used highlighted.
Supersampling option from the action menu
to show the menu displaying the available options with the currently used highlighted.
The Supersampling computes several samples per pixel and takes an average color. This produces much cleaner images (smooth curves, no glitches) at the expense of slower rendering and increased battery consumption.
The app uses the root mean square (RMS) for color averaging. The RMS is used twice: first to calculate the average color and then to calculate the average light (if the light is used).
When the supersampling is used, the app partially restarts rendering after changing a color palette, the palette length or offset, or light options.
You can choose from the available options from 2x2 (4 samples per pixel) to 5x5 (25 samples per pixel). In the Free version only the Low (2x2) option is available. Unlock the Premium to get access to all of them.
The supersampling optimization uses edge detection to reduce rendering time by skipping the supersampling for pixels with a color close to their adjacent pixels. This can significantly speed up rendering when your image only has small areas with a lot of detail. The Cautious option is the slowest and produces the cleanest images. The Aggressive option is the fastest at the expense of quality.
NOTE: the optimization may produce images not as clean as with the full supersampling. It may be very useful for speeding up the Video rendering but we do not recommend using it for exporting high-quality images, e.g. for printouts.
Tap OK or tap outside the popup to save your changes and hide the menu.
The current supersampling option is displayed in the status bar as the size extension. For example size=1080x1080x5C30% means 5x5 supersampling with the Cautious optimization, resulting in 30% of the image rendered with the full supersampling (70% of the supersampling time saved).
When the status bar is hidden, the progress bar turns orange while supersampling is being applied.
An example result of applying supersampling (reduced resolution to better show the effect on individual pixels).